Homemade Ice Cream: 6 Yummy Recipes

Some say “Life is better with ice cream,” and we couldn’t agree more. Nothing beats the taste of refreshing ice cream on a hot summer day or as a sweet treat after a meal. Best of all: you can make it at home! Here are some fun recipes to get you started.
Is making homemade ice cream worth the time and effort, considering the variety of options in stores? Absolutely! Homemade ice cream is healthier, tastier, and allows you to create unique flavors you can’t find anywhere else. Plus, you can cater to any dietary needs, such as lactose-free or sugar-free options.
Tip: Use up those eggs or cream before they go bad by making ice cream! Overripe fruits, like bananas, are perfect for adding sweetness and flavor to your creations.
Why Homemade Ice Cream is Healthier
Wondering why homemade ice cream is a healthier choice? It’s simple: you control the ingredients. No preservatives or unnecessary additives – just pure, delicious goodness.
Store-bought ice cream also contains a good amount of sugar and fat, even frozen yogurt and other variants often marketed as healthier. When you make your own ice cream, you are free to use healthier ingredients, such as fruit as a natural sweetener.
What Do I Need?
Ice cream machines are certainly handy. All you need to do is put all the ingredients in the machine, press a button, and voila, you have delicious homemade ice cream in half an hour. But ice cream machines are not cheap, and even though they are practical, such a machine might not be used often enough to justify taking up valuable space in your kitchen cupboard.
It’s good to know that it’s entirely possible to make delicious ice cream without a kitchen machine dedicated solely to this purpose. You can do a lot with a simple whisk or a good hand blender. Yes, you can even make ice cream without any whipping at all! Read more about this fun way to make ice cream further down.
How Long Should Homemade Ice Cream Freeze?
This is a question that doesn’t have a precise answer, as it depends on several factors, but expect it to take somewhere between four to six hours.
How long the ice cream needs to get the right consistency depends, among other things, on the type of freezer you have. There can be a big difference if you have a standalone deep freezer or a smaller freezer integrated into your fridge.
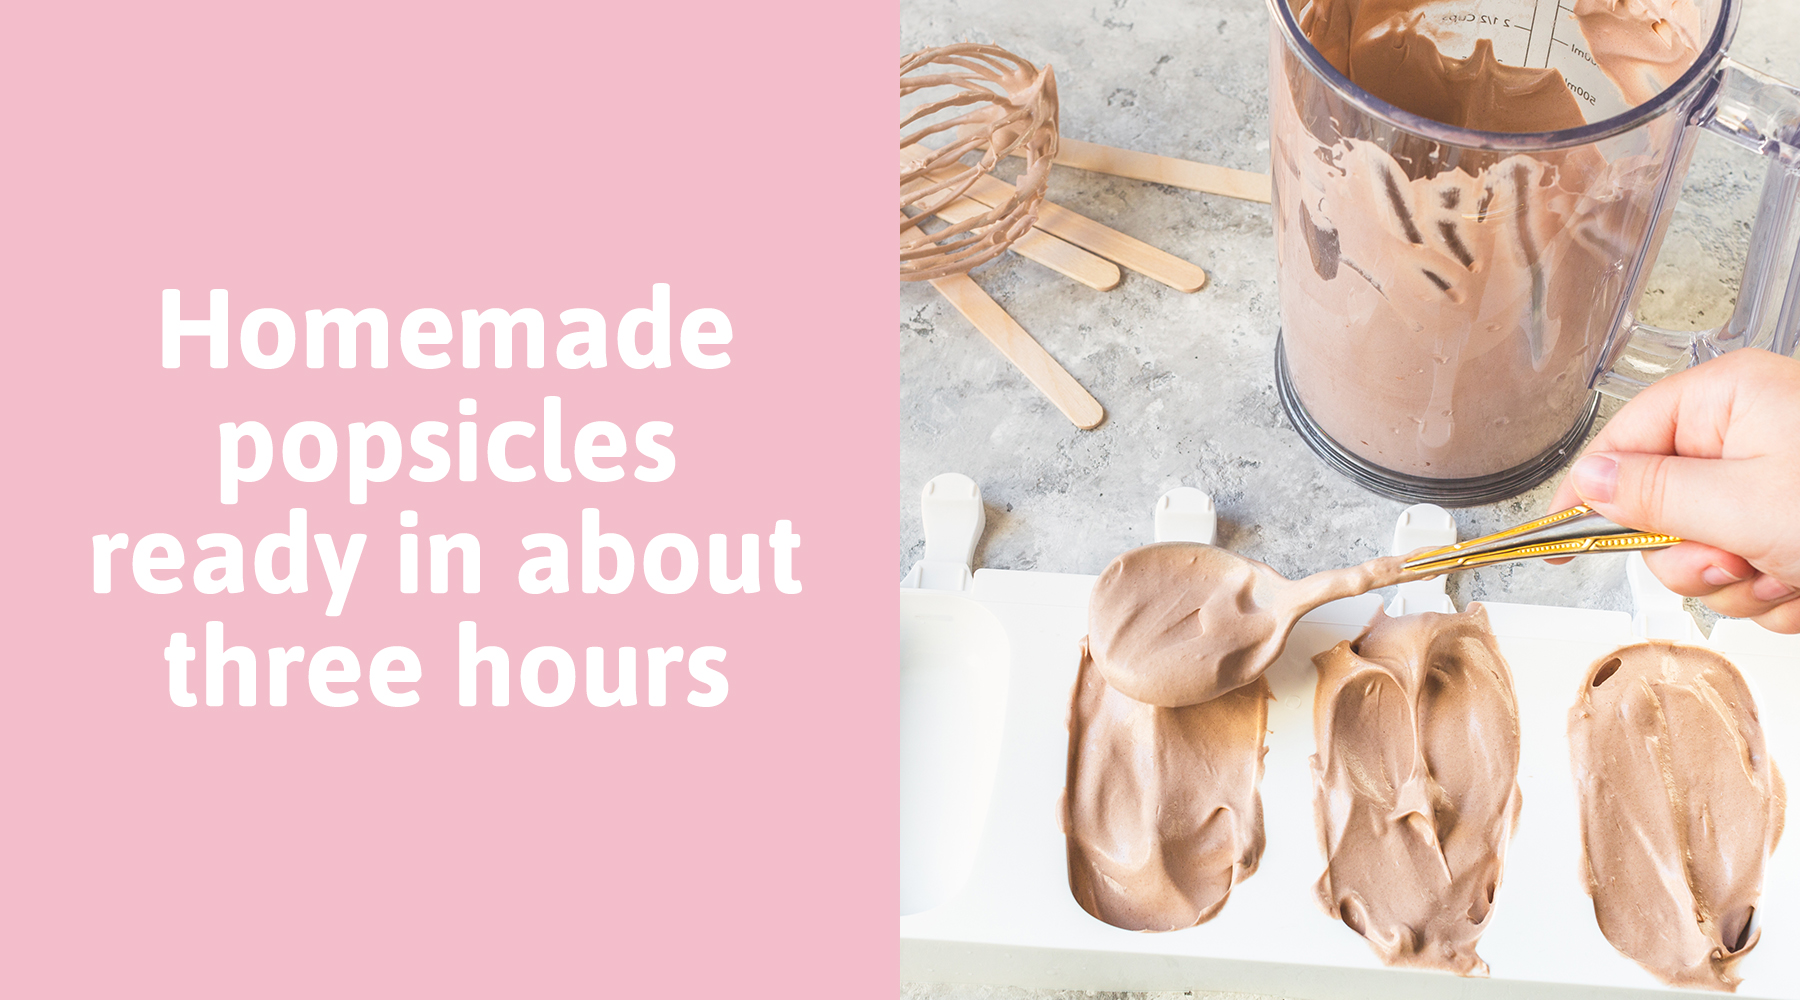
The size of the container also plays a role. Larger containers, like loaf pans, may require at least five hours or overnight. Small popsicle molds are usually ready in about three hours.
How to Avoid Ice Crystals in Ice Cream
Making homemade ice cream is a breeze, but for those larger, show-stopping desserts, stirring is key! For the creamiest results, take your ice cream out of the freezer every half hour and give it a good stir before popping it back in. Keep this up until it’s fully frozen.
Why all the stirring? It helps keep those pesky ice crystals at bay. A few ice crystals here and there aren’t a big deal—they’re just a bit crunchy and watery. But too many can turn your delightful dessert into a chewy mess. So, stir away and enjoy the smooth, dreamy ice cream you deserve!
Ice Cream – Serving Tips
Ice cream is delicious on its own, but with some fun toppings, it becomes irresistible! Sure, you can stick with fruits and berries or classic chocolate and caramel sauce, but why not shake things up with crispy bacon? It might sound odd, but the sweet and salty combo is a winner for many.
Just cut bacon into small cubes, fry them with butter until crispy, and let them drain on a paper towel. Then, chop them even smaller to make perfect little sprinkles.
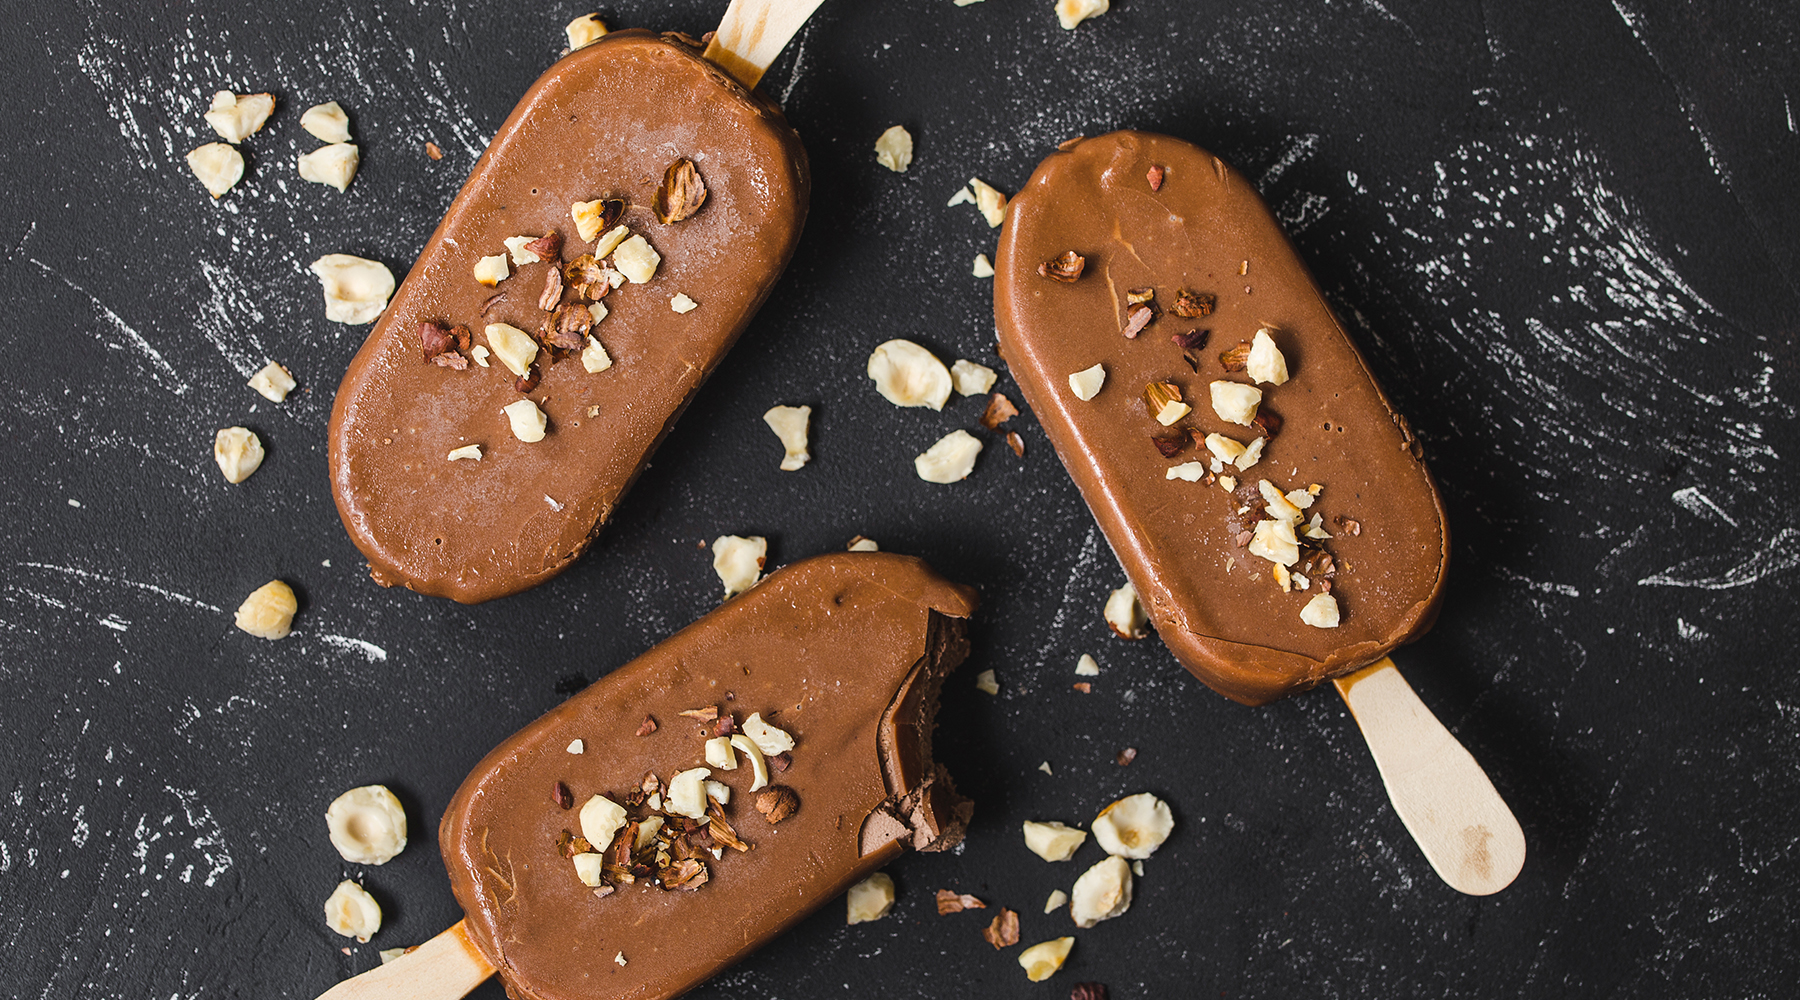
Other exciting toppings to try are warmed peanut butter, crushed pretzels, caramelized nuts, crushed potato chips, chopped hazelnuts, or your favorite candies. Get creative and take your ice cream to the next level!

No-Churn Ice Cream Recipe
Impress your guests with homemade gingerbread ice cream or serve strawberry ice cream at a birthday party. This recipe is simple and delicious!
Ingredients:
• 1 can (14 oz) sweetened condensed milk
• 2 cups heavy cream
• 1 vanilla bean (or a few drops of vanilla extract)
Instructions:
In a large mixing bowl, whip the heavy cream and vanilla until soft peaks form, then gently fold in the sweetened condensed milk until fully combined. Add your favorite flavors, such as chocolate pieces, melted chocolate, caramel sauce, crushed cookies, or berry coulis. Pour the mixture into a loaf pan or a freezer-safe container, cover with plastic wrap, and freeze for at least 6 hours or overnight. Scoop and enjoy your homemade ice cream with all your favorite toppings!
Melon-licious Yogurt Ice Cream Adventure!
Looking for a guilt-free frozen delight? Dive into this easy-peasy, low-calorie yogurt ice cream with a burst of melon flavor!
Ingredients:
• 2 egg yolks
• 1/4 cup sugar
• 1 3/4 cups yogurt with melon or passion fruit
• 1/2 cup vanilla quark (e.g., vanilla Greek yogurt)
Instructions:
Whisk the egg yolks and sugar until fluffy, using a hand mixer or stand mixer if available. Stir in the yogurt and quark. Pour the ice cream mixture into a metal bowl (metal conducts cold the fastest) and cover the surface with plastic wrap. Place the bowl in the freezer for about two hours until it begins to freeze. Take it out of the freezer and beat it well with a hand mixer or stand mixer. Repeat this at least twice before the ice cream is completely frozen. Cover the surface with plastic wrap to prevent ice crystals from forming on top.
Homemade Ice Cream in a Bag
Get ready for a hands-on adventure with this exciting ice cream-making activity! All you need are two plastic bags, preferably with zip locks, to whip up a delicious treat.
Ingredients:
• 1/2 cup milk
• 1/2 cup cream
• 2-3 tablespoons sugar
• 2 tablespoons berries or jam of your choice
• Ice cubes
• 1/2 cup salt
Instructions:
In one bag, mix together the milk, cream, sugar, and your choice of berries or jam. Make sure to press out any lingering air before sealing the bag tightly. Then, fill the other bag with ice cubes and pour in the salt.
Now, pop the bag with your ice cream mixture into the ice bag, seal it up, and get ready to shake! Shake vigorously for 5-10 minutes until your ice cream is set and ready to enjoy. Watch in amazement as the salt works its icy wonders, freezing your creamy concoction in record time. Get shaking and create your very own ice cream masterpiece!
Heads up! The ice cream gets seriously chilly, so you might want to grab a kitchen towel to handle the bag.
For Chocolate Lovers
Craving chocolate? This rich ice cream can be made healthier with dark chocolate.
Ingredients:
• 5.3 ounces of cooking chocolate
• 1 1/4 cups of heavy cream
• 1/4 cup of sugar
• 4 egg yolks
Instructions:
Start by finely chopping up the cooking chocolate and placing it in a bowl. Then, heat up a bit of the heavy cream with the sugar until the sugar dissolves. Pour this mixture over the chocolate and let it sit for a couple of minutes before stirring until smooth.
Add the egg yolks one at a time into the chocolate mixture, whisking well.
Next, whip the remaining heavy cream until stiff peaks form, and gently fold it into the chocolate mixture. Pour everything into a suitable mold and cover it with plastic wrap. Place it in the freezer for at least 6 hours.
Before serving, allow the ice cream to soften in the fridge for about 20 minutes. Serve in cones with grated chocolate or chocolate sauce on top for an extra treat. Enjoy your homemade chocolate delight!
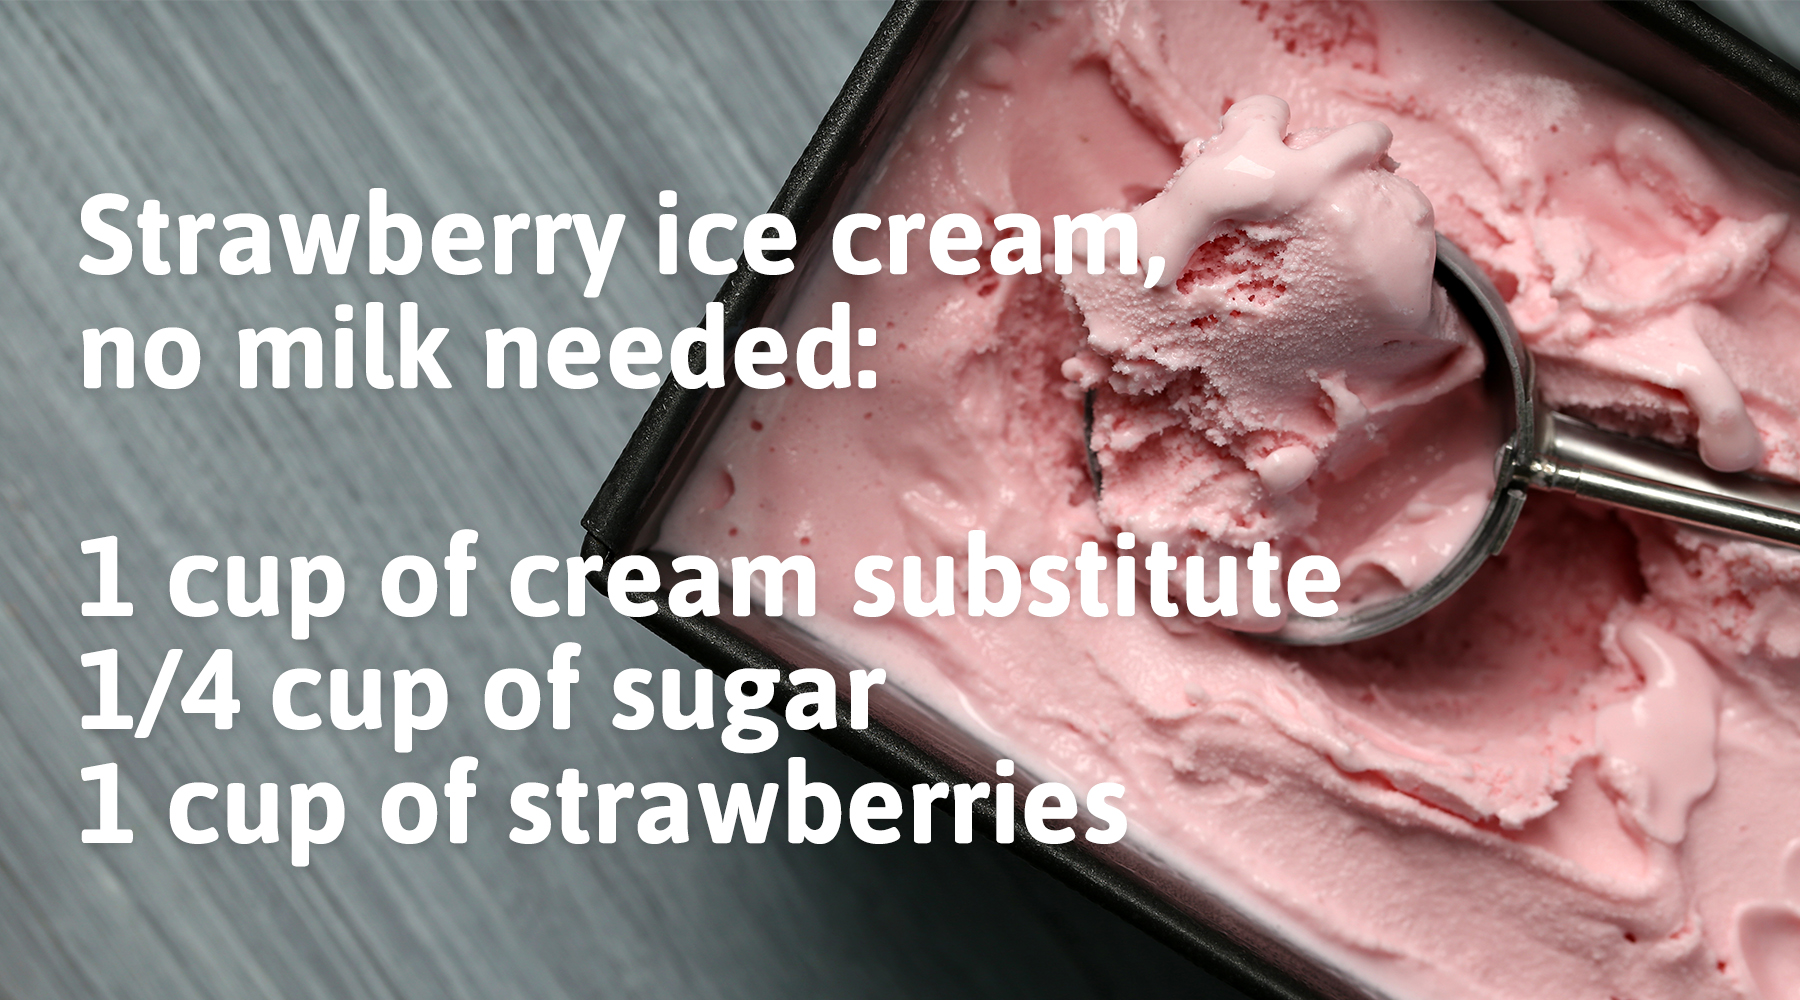
Strawberry Ice Cream Without Milk
Indulge in this refreshing treat that’s perfect for those with lactose sensitivities! Here’s what you’ll need:
Ingredients:
• 1 cup of dairy-free cream substitute
• 1/4 cup of sugar
• 1 cup of fresh or semi-frozen strawberries
Instructions:
In a mixing bowl, whip up the dairy-free cream substitute and sugar until it reaches a creamy consistency. Lightly mash the strawberries using a hand blender or fork, then fold them into the creamy mixture. Transfer the mixture into an airtight container with a lid and pop it into the freezer. Every hour for the first four hours, give the ice cream a good stir with a spatula to prevent ice crystals from forming. After three to four hours in the freezer, your ice cream will have the perfect soft-serve texture ready to be enjoyed! Treat yourself to this creamy, lactose-free delight bursting with the fresh flavor of strawberries. It’s a taste of summer in every scoop!
Sugar-Free Ice Cream with Chocolate
Craving a scoop of guilt-free indulgence? Whip up this fantastic sugar-free ice cream made with a brown sugar replacement that’ll satisfy your sweet tooth without the sugar rush!
Ingredients:
• 3 egg yolks
• 3 tablespoons of Swerve Brown Sugar Replacement or Truvia Brown Sugar Blend
• 1 1/4 cups of heavy cream
• 2 tablespoons of cocoa powder
• 1 teaspoon of vanilla powder
• A pinch of salt
Instructions:
Whisk the egg yolks and the brown sugar replacement in a mixing bowl until they form a thick, creamy mixture, then set it aside. In another bowl, whisk together the heavy cream, cocoa powder, vanilla powder, and a pinch of salt until everything’s well combined and smooth. Gently fold the egg yolk mixture into the creamy cocoa goodness, blending them together into ice cream magic. Pour the mixture into a container or mold with a lid, cover it up, and pop it in the freezer. After about four hours of freezing time, your ice cream should be perfectly chilled and ready to scoop! Just remember to give it a stir once an hour while it’s freezing to ensure that perfect creamy consistency.
If your ice cream gets a little too frozen-solid, don’t worry! Just take it out of the freezer and let it hang out in the refrigerator for at least an hour before serving. Then, grab your spoon and dive into a bowlful of pure frozen bliss!
Visit our website for more inspiration for other great recipes that are perfect to make with kids!
Latest post from the blog

Quiz for Children: 35 Fun Questions for the Whole Family
Looking for a fun quiz for children? Here you have 35 quiz questions for different levels of difficulty + tips on how to make the quiz extra fun.

Allergy-Friendly Baking for Kids’ Birthday Parties – 3 Easy and Delicious Recipes
Three kid-friendly cakes that are dairy-free, gluten-free, and egg-free. Perfect for birthdays, preschool, or weekend fun – stress-free and safe for everyone to enjoy.

Five Smart Meal Hacks Every Parent Should Know
Cooking doesn’t have to be stressful. These five simple tips can make your day a little smoother and your mealtimes happier.